Yealink W60B Setup Instructions
Basic configuration of the Yealink W60B phone requires configuring just two pages of the phone's web UI.
Plug the phone into a free LAN port on your AREDN switch, such as a hAP Lite, hAP ac3 or hAP ac3. The phone should request an IP address from that device. Navigate to this IP address using your web browser. At the login screen enter the default login information.
Network configuration
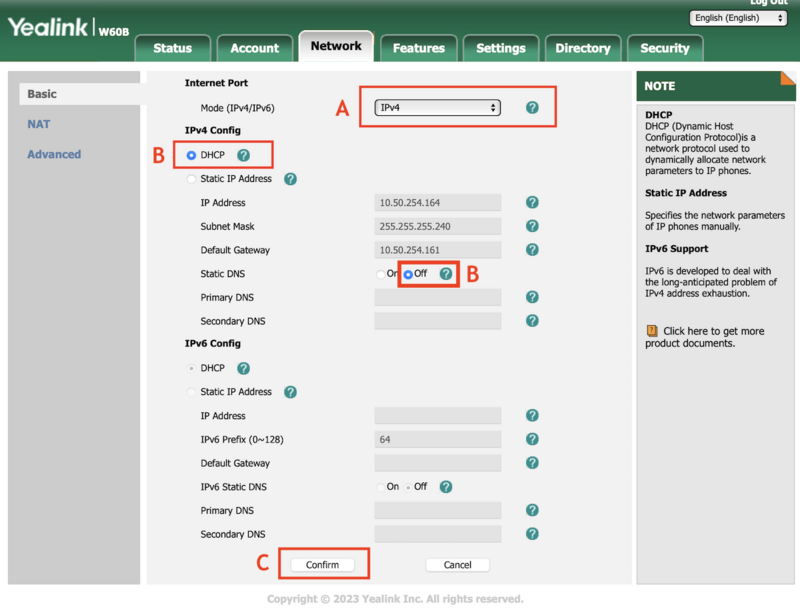
The network configuration probably works fine as you've succesfully logged into the web UI already. However, it make sense to check it. On the Network tab (see below) make sure:
A. The Mode is set to IPv4
B. The IPv4 Config is set to DHCP and that the static DNS setting is set to Off.
C. Hit the Confirm button to save.
Account Setup
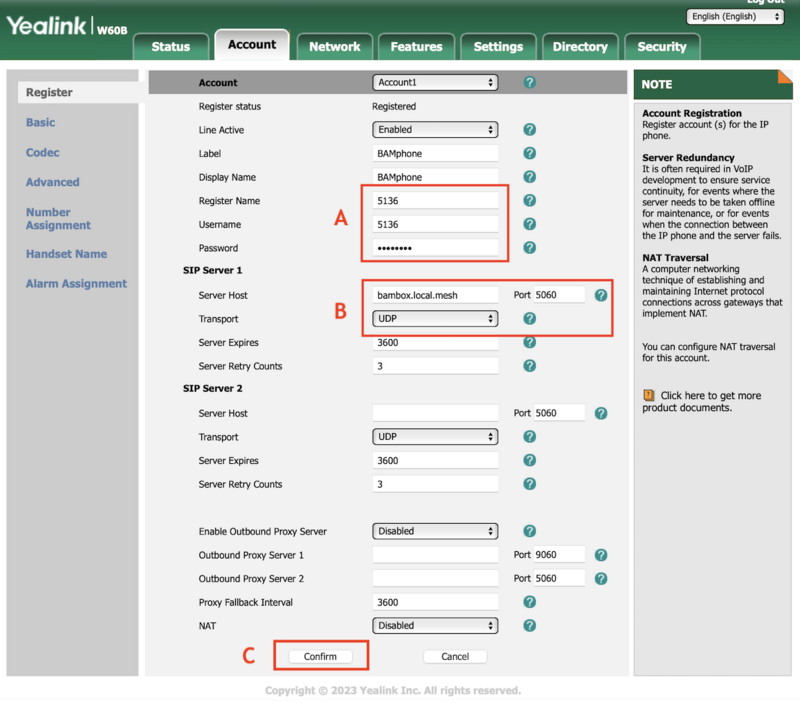
The account tab is where we register the phone with the exchange server. Before doing this you should contact your exchange administrator to get your account username and password. We need to enter those below:
A. Enter your account username as in the Register Name and Username fields. Enter your password in the Password field.
B. Enter the hostname of your server in the Server Host box. You should be able to use the fully qualified name here and the phone will locate the server. You can also use the exchange's IP address. Select the Transport as UDP. Enter the Port as 5060. This is the default port used by most exchanges, but it can be different. If you administrator gave you a different port number, this would go here.
C. Hit the Confirm button.
The phone should take a moment, then display Registered. If it say Register Failed go back and make sure everything is configured correctly.

